Thursday, March 13, 2014

Gluten-Free Lettuce Wraps (like PF Changs)!

First, my apologies. It's been awhile since I've posted anything. I've been cooking, but in the past year we have planned a wedding, gotten married, moved in together, and have spent a lot of time remodeling our house. In other words, I've been cooking (gluten-free) almost every night, but have forgotten to make time to post the recipes. Lately, I've been taking pictures to get back at it!

Anyway, one of Scott's favorite restaurants is PF Changs. They have a great gluten-free menu with lots of options and he basically loves any kind of asian food. I could almost do without asian food for the most part (it always seems too sweet or spicy for me) with the exception of PF Changs lettuce wraps. I love them. We went to celebrate his birthday there in January and I realized I should try to make lettuce wraps at home! Here is my gluten-free version of PF Changs lettuce wraps. They were actually very easy, and to me, tasted very similar to the "real" thing. We made it a dinner instead of just an appetizer. 
In my opinion, the most time consuming part was gathering ingredients that you may not just have on hand (like sesame oil, water chestnuts, etc). 

What You Need: 

1 head iceberg lettuce
3 cloves of garlic, minced
1/4 cup sugar
1/2 cup warm water
2 boneless skinless chicken breasts, cubed, diced, or minced (your preference)
2 tablespoons extra virgin olive oil
2 tablespoons sesame oil
1 - 8oz can water chestnuts, chopped
4 tablespoons gluten free soy sauce (I used Tamari)
2 tablespoons ketchup
1 tablespoon lemon juice
1/2 onion chopped fine
2 tablespoons brown sugar
3 tablespoons rice vinegar
1/2 cup mushrooms, minced (optional)

What You Do:

If you've been to PF Changs, you'll remember they mix a sauce for you at the table to add to your lettuce wraps. We're going to call that the "pouring sauce." We will also be making a marinade to add to the actual stir fried chicken and veggies.

Pouring sauce:
1. In a medium bowl, dissolve 1/4 cup sugar with 1/2 cup warm water.  Then add 2 tablespoons of gluten-free soy sauce, 2 tablespoons rice vinegar, 2 tablespoons ketchup, 1 tablespoon lemon juice, and 1/4 teaspoon sesame oil.  Place this mixture in the fridge.
2. In a separate smaller bowl, combine 1 teaspoon hot water, 1 tablespoon dijon mustard, and 2 cloves of garlic, minced. Mix well and set mixture aside until ready to serve.

Lettuce Wrap Filling:

1. Combine 2 tablespoons of olive oil and 2 tablespoons of sesame oil in a wok or large frying pan. Heat about 1 minute. Add chicken (I actually used my food processor and put the chicken breasts in whole to cut them up finely like PF Changs, but you could easily do it with a knife or leave it in larger pieces if you prefer) and sauté until cooked through. The pieces are small so this will only take about 5 minutes at most. Remove chicken from pan and cool. Keep oil in the pan over low heat.
2. Prepare the stir fry sauce by mixing 2 tablespoons gluten-free soy sauce, 2 tablespoons brown sugar, and 1/2 teaspoon rice vinegar in a small bowl.
3. Turn the pan with the oil up to high heat and add another tablespoon of olive oil. After about 1 minute of the oil heating, add chicken, 3 tablespoons minced garlic, chopped onions, water chestnuts, mushrooms (optional) and the stir fry sauce that you just made.
4. Stir fry everything until the onions have cooked, about 4-5 minutes.
5. While stir fry is cooking, rinse your lettuce and break off large lettuce pieces to serve as the wrap. We found that the larger pieces were the easiest to eat.
6. Remove stir fry and place in dish alongside the lettuce cups.
7. Remove "pouring sauce" from fridge and combine with dijon mustard mix that you had set aside.  Use a whisk to make sure it mixes completely.


Serve the lettuce wraps, the chicken stir fry mixture, and the pouring sauce together and combine the ingredients to make what I think is pretty close to PF Changs lettuce wraps gluten-free version.
Scott absolutely RAVED about these!
Enjoy!


Monday, February 18, 2013

Gluten-Free Crusted chicken with Basil Cream Sauce

I'm not sure about everyone else who eats gluten-free, but I know that Scott always misses things that have "crunch." Luckily, about a year ago we discovered Schar gluten-free breadcrumbs, and now we always have some on hand. Occasionally they'll go on clearance and we will stock up. They are good, easy, and they work for any recipe that requires breading or bread crumbs. 

I modified a recipe I had seen online for this dish to make it gluten-free and it was absolutely delcious. Scott even commented that he felt like he was eating at a restaurant! You won't be disappointed if you try this one out. We served it alongside Trader Joe's gluten-free corn pasta, as the sauce is really good with the pasta. It would also be really good with potatoes, broccoli, rice, or whatever side dish you choose. I also made a salad to go along with it. 

What You Need: 
  • 2 boneless skinless chicken breasts, pounded thin. More if serving more than 2 people
  • 1/2 cup Schar gluten-free breadcrumbs (or any gluten-free breadcrumbs)
  • 3-4 cloves garlic, minced
  • 1 teaspoon garlic salt
  • 1 teaspoon dried oregano
  • 3 tablespoons butter (salted or unsalted, I used salted because that is what I had on hand)
  • 1/2 cup gluten-free chicken broth (Most are gluten-free but check the back. I know for a fact Swanson brand is always gluten free)
  • 1/2 can Italian diced tomatoes, drained
  • 1 1/4 cup whipping cream 
  • 1/2 cup shredded parmesan cheese blend
  • 3 tablespoons fresh basil (can use dried basil, but fresh is best)
  • 1 teaspoon ground black pepper
What You Do:

  1. In a shallow bowl, mix gluten-free bread crumbs, garlic salt, and oregano.
  2. In a separate shallow bowl, put 1/4 cup of the cream (you could also use an egg wash or milk to make coating stick, but I figured since we already have cream out, might as well use that)
  3. In a skillet or saucepan, heat butter on medium heat.
  4. Pound chicken flat and thin using a meat tenderizer. 
  5. Dip the chicken in the cream, then coat with the bread crumb mixture. 
  6. Cook chicken in butter until browned and cooked - approximately 8-10 minutes depending on the size of the chicken breasts. If the crust is getting too brown you can always put it in the oven at 325 for additional cooking but since they're thin they will probably just cook through on the stove.
  7. Remove chicken and keep warm (I put them in the oven at a warm setting since they were cooked, around 200 degrees)
  8. In the same skillet, add minced garlic and cook for about one minute. Add chicken broth and bring to a boil over medium heat, stirring often.
  9. When mixture comes to a boil, stir in cream and tomatoes. Bring to a boil and then reduce heat to low.
  10. Add parmesan cheese, chopped basil, and pepper . Stir until cheese is melted and sauce thickens (about 5 minutes). Remove from heat. 
Serve by pouring the sauce over the chicken, and pasta (if you use that as a side dish) or potatoes or whatever you choose!You will not regret giving this recipe a try. It was so good! If you can't find gluten-free breadcrumbs in a grocery store near you, you can always make your own by grinding up ends of gluten-free bread loaves. I have also made my own using gluten-free croutons before (just threw them in the food processor).


Enjoy!! This is a good one!!


Sunday, January 27, 2013

Gluten-Free White Cheddar Mac and Cheese with Caramelized Onions (Bacon optional)

Gluten-Free White Cheddar Mac and Cheese with Caramelized Onions and Bacon
There's nothing to warm up a Chicago winter like comfort food. I decided to try to come up with my own rendition of homemade mac and cheese, using gluten-free pasta, and adding some rich ingredients to make one of the best versions of mac and cheese we have ever had. Scott isn't even a huge mac and cheese fan, and he can't get enough of this recipe.


What You Need:
For mac and cheese:

  • 1 Box Gluten-free pasta (I used Ancient Harvest Quinoa Elbows)
  • 3 tablespoons butter 
  • 1/2 cup gluten-free flour (I used Bob's Red Mill Rice Flour, any GF flour mix would work)
  • 1.5 cups shredded white cheddar cheese (I used Cracker Barrel Vermont White Cheddar)
  • 5 slices white american cheese, cut up for melting purposes
  • 2.5 cups of 2% milk
  • 1 teaspoon sriracha (or any type of hot sauce)
  • 1 tablespoon Dijon mustard
  • 1 teaspoon kosher salt 

For caramelized onions:
  • 1 sweet yellow onion, sliced
  • 1 tablespoon olive oil
  • 1 tablespoon butter
  • Kosher salt
  • 1 teaspoon balsamic vinegar

What you do:

If adding caramelized onions, you should make those first. They take about 20 minutes, but it's simple. Here's what you do:

Caramelized Onions:
1. Heat 1 tablespoon olive oil and 1 tablespoon butter together in a small skillet on low heat.
2. Add onion slices, and sprinkle with kosher salt (brings out the sweetness). Leave on low heat stirring every 5 minutes or until onions soften and look opaque. 
3. Add balsamic vinegar and leave heat on low for about 5 more minutes. Remove and set aside.

Mac and Cheese: 

1. Bring water to a boil and add pasta to pot. Drain after pasta is cooked.
2. In a large saucepan, melt butter. Add gluten-free flour to the butter whisking together constantly. 
3. Slowly add milk and continue whisking constantly. Mixture will look strange at first (like the picture) but will eventually come together to create a thick sauce.
4. When all the milk is added, keep mixture on the stove until it begins to bubble and thickens. Remove from heat.
5. Add shredded white cheddar, white american cheese, sriracha (or hot sauce), dijon mustard, and salt. Stir until cheese melts and sauce becomes creamy. 
6. Add sauce to pasta in a bowl and mix until pasta is coated in cheese sauce. 

Gluten-Free Mac and Cheese with Bacon and Caramelized Onions
At this point, plain mac and cheese is done, and can be served this way.  However, I added the caramelized onions and some bacon bits since Scott is a huge fan of both of these things. Just add them and stir them in.  He raved about the onions. I ate mine plain (no bacon or onions) and it was still absolutely delicious.

If you have been searching for a great gluten-free version of homemade mac and cheese, try this recipe. You won't be disappointed. It's rich, but it's delicious and the perfect combination of ingredients for a cold winter day (or, any day really). Enjoy! 


Friday, February 24, 2012

Chocolate Chip Cheesecake!

Last Valentine's Day, I cooked (Shrimp Scampi and Cheddar Bay Biscuits, gluten free!). This year we opted to go out - but I still wanted to do something special, so I made dessert! Gluten-Free Chocolate Chip Cheesecake, where obviously the challenge was making a gluten-free crust. 

What You Need:
  • 1 Box Betty Crocker (or other kind) Gluten Free Chocolate Chip Cookie Mix
  • Butter, vanilla, and egg as called for on box.
For the filling:
  • 3 packages (8 oz each) cream cheese, softened. I used 1/3 less fat. I don't think fat free would work.
  • 1 1/4 cups sugar
  • 2 teaspoons vanilla
  • 4 eggs
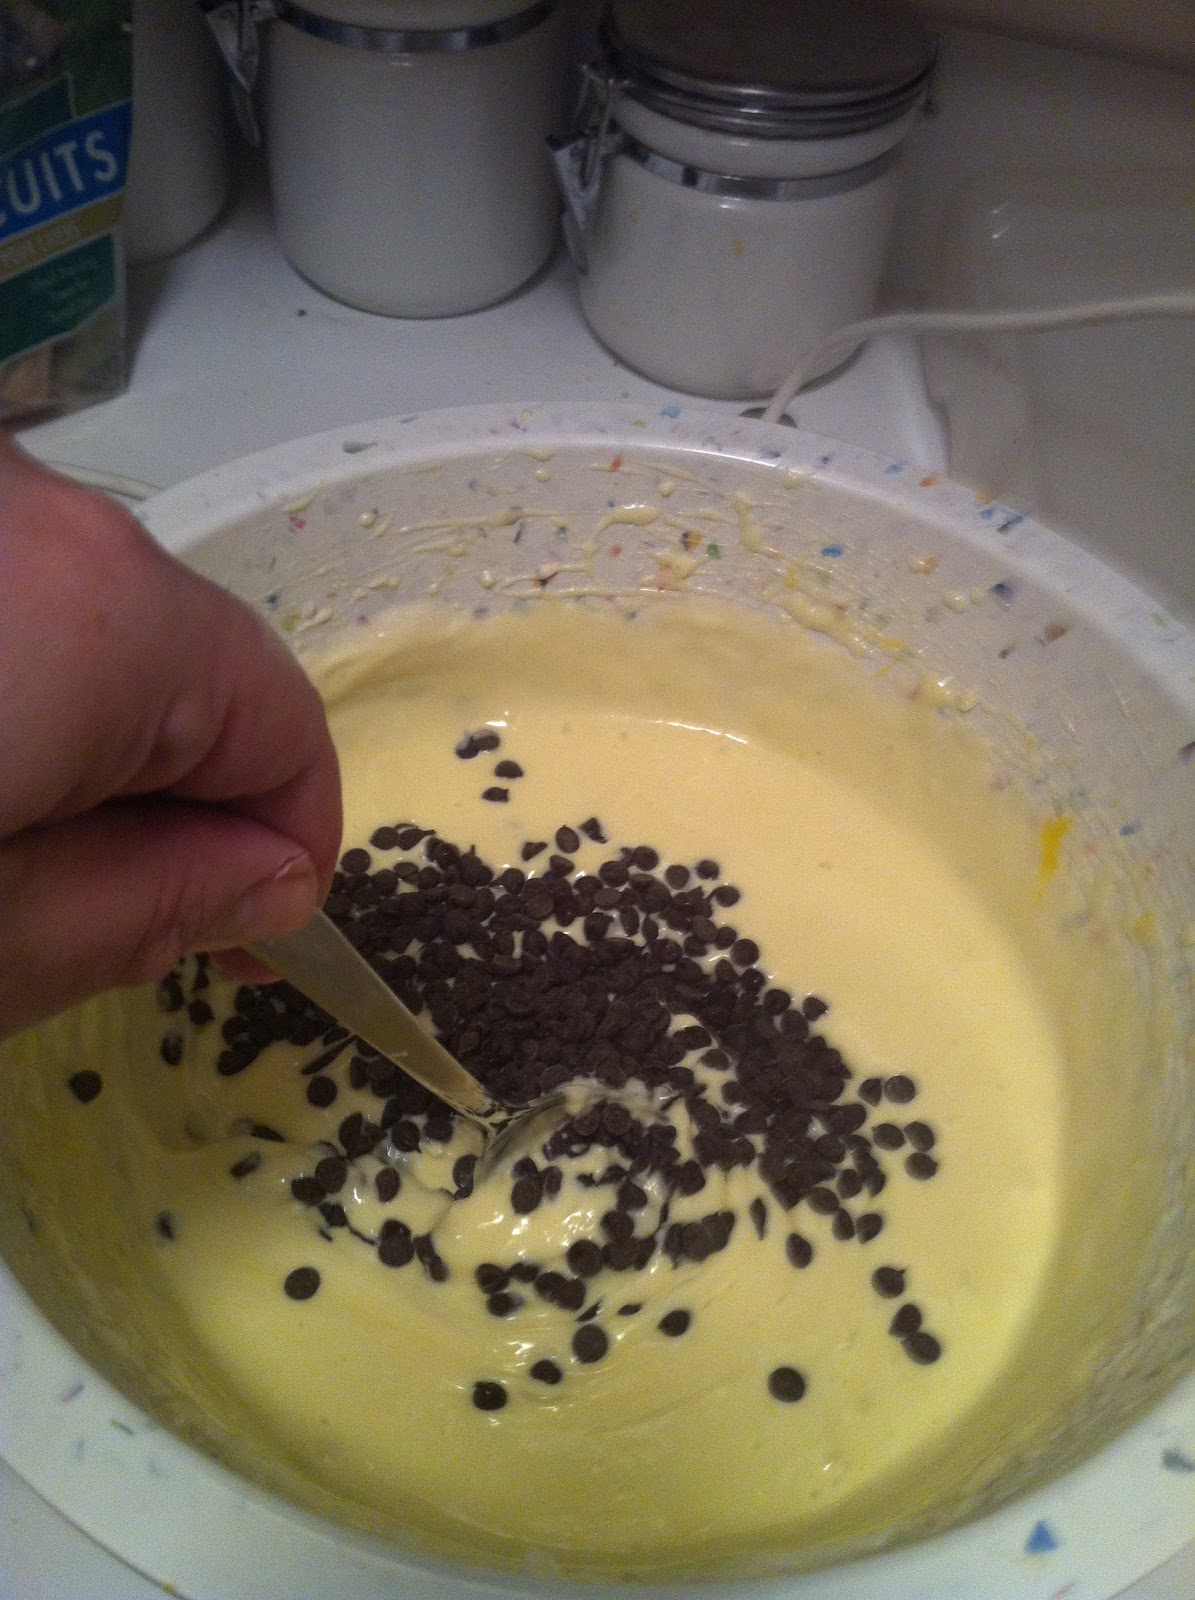
  • 1/2 cup miniature chocolate chips


I used Betty Crocker's Gluten Free Chocolate Chip Cookie mix (I am sure any GF cookie mix would work). I made it as directed and placed into a greased 10" pie pan, pressing it down firmly as you would a normal, homemade crust.
What You Do: 
1. Mix cookie dough according to box instructions and press firmly into a greased 10" pie pan. 
2. Preheat Oven to 325.
3. In a large bowl, mix together cream cheese (softened) and sugar until well blended. 
4. Beat in vanilla.
5. Beat in eggs, one at a time. 


 6. After mixing in all four eggs, one at a time, stir in mini chocolate chips.


7. Pour  mixed filling into the crust. 
8. Bake 1 hour and 15 minutes or until crust edges are brown. Let cool completely before serving and place in the refrigerator if not serving immediately.


It was VERY good. I know this is not a healthy recipe by any means, but I was shocked how well it turned out to use cookie mix for the crust. We loved it - it was rich, but delicious. It was definitely way too much for two of us, but I know it would be a hit at a party... and I can almost guarantee you, people would have NO idea it was gluten free. :)

Tuesday, October 18, 2011

Gluten-Free Summer Pasta


Yummmmm. This is good stuff. It tastes so fresh. A friend of mine sent me a recipe from the New York Times called Summer Pasta. It is delicious. After making it a few times, using both regular pasta and gluten-free pasta, I have adapted my own version of it based on my personal taste and feedback from dinner guests.

Quick Disclaimer: For this particular time, I used regular pasta, but that is the only thing that is not gluten-free in the recipe so it can be easily substituted. That being said, I have made it using Trader Joe's Brown Rice Fusilli, and it was equally as delicious and fresh. You can use any type of gluten free farfalle, penne, or fusilli.

Another quick disclaimer: I really love garlic, so I don't mind it but some have told me the garlic taste is too strong in this recipe, since the garlic is added raw. If you aren't a huge fan of garlic, you may want to cook your garlic first over the stove in some olive oil. Personally, I like it the way it is.

The roasted tomatoes can be time consuming, but you can leave them for awhile without really paying attention to them. I think they are best slow roasted as the recipe states.... but there is an alternative. You can use grape tomatoes and get a similar taste in about a half hour. But, if you have the time, do it the 4 hour way. It's worth it.

SUMMER PASTA

What You Need:

For the roasted tomatoes:

Roasting grape tomatoes
2 1/2 pounds tomatoes (or as I mentioned, grape tomatoes if you don't have the time to slow roast, I used grape tomatoes this time, but I like it much better the other way)
2 tablespoons olive oil
1 1/2 teaspoons salt
2 teaspoons sugar

For the pasta:

Salt to taste, pepper optional
1 pound gluten-free pasta, like farfalle, penne, or fusilli
2 to 3 cloves garlic, finely minced and mashed

2 tablespoons melted butter
2 tablespoons extra virgin olive oil
2 ears corn, can be raw if very fresh, or lightly steamed if not
2 pints cherry or grape tomatoes (can be red, orange or yellow) halved or quartered
12 ounces fresh mozzarella
fresh mozzarella cut up
(some basil remained from cutting board)
1/4 cup grated parmesan cheese
1 cup mixed herbs, cut or torn into small pieces (mostly fresh basil, with some mint and parsley)

What You Do:

Roasting the Tomatoes:

1. Heat oven to 275 degrees. Line a large baking sheet with parchment paper. Slice tomatoes about 3/4 inch thick. Lay slices on baking sheet and drizzle with olive oil. Sprinkle with salt and sugar. Bake 15 minutes and reduce heat to 200 degrees. Continue baking, cooking halfway through until tomatoes shrink and are chewy but not crisp, approximately 4 to 6 hours. As I mentioned previously, if you don't have time to do this - an alternative is baking grape or cherry tomatoes (1 pint) after being halved, in the same mixture, olive oil, sugar, and salt at 350 for 30 minutes or so, turning halfway through. It will give a similar taste, but the best way is to do it the long way.

herbs, tomatoes, raw garlic
Chopped herbs
2. When tomatoes are roasted, bring a large pot of lightly salted water to a boil. Add pasta, cook until al dente. While pasta is cooking, chop roasted tomatoes very finely and place in a large serving bowl, along with the chopped garlic, butter and olive oil. Slice kernels from cobs of corn, and chop the other grape tomatoes, and herbs (finely) while pasta is cooking as well. Place tomatoes, corn, and herbs in a separate bowl. Slice fresh mozzarella into small pieces, and place in a separate bowl with the shredded parmesan.

3. When pasta is cooked, drain well. Add to the bowl with butter, garlic, and olive oil while still hot, and toss pasta.

4. Add the corn, cherry or grape tomato mixture and the cheese mixture. Toss well. Add herbs and toss well again. Add salt and pepper to taste while tossing.


Serve warm or at room temperature.

I didn't actually get to use the corn this particular time because unfortunately, it's October and sweet corn is out of season. However, it is SO good with the corn. This is the first time I have made it without and I definitely missed it. I thought it was strange at first to add the corn raw but it's actually delicious and very fresh. If you are able to get sweet corn, don't leave it out. It is delicious with these ingredients.

So good! You should definitely try this one.

Enjoy!

Monday, October 17, 2011

Chicken, Artichoke, and Wild Rice Casserole


This recipe was DELICIOUS, easy, and gluten-free. It could also be made ahead if necessary.

I used some ingredients I had around and modified a few recipes I had found online to make it gluten-free. We loved it. Very hearty and warm and delicious!

What you Need:
1 can Progresso Creamy Mushroom Soup (it's gluten-free!)
1 cup uncooked wild rice (I used Trader Joe's Basmati Rice Medley b/c it includes veggies. Any wild rice would do, or white or brown rice if you prefer those)
1 tbsp olive oil
1 lb cooked chicken breasts
1 bag frozen artichokes (I used Trader Joe's frozen artichokes, could also use a can of artichoke hearts or fresh artichokes)
1/4 cup low-fat mayo (could use regular if you'd like)
1/4 cup cheddar cheese (optional) for topping

What you Do:

1. If necessary, cook chicken breasts over stove. I used fresh chicken breast tenderloins and chopped them up first and seasoned them with salt and pepper. I cooked them with olive oil in a skillet for about 5-7 minutes or until browned.
2. Prepare 1 cup of wild rice (or white or brown rice) using 2 cups water and 1 tbsp olive oil. Prepare according to package directions.
3. In a large mixing bowl, combine creamy mushroom soup, artichokes (defrosted if frozen), mayo, cooked chicken, and cooked rice. Stir until mixed thoroughly.
4. Pour mixture into a 9 x 13 pan. Top with cheddar cheese (optional).
5. If making ahead, cover with foil and place in fridge. If ready to cook - preheat oven to 350 and cook for 30 minutes with foil covering the top.

Remove from oven and serve.

It was really good and really easy! Very hearty!

Enjoy!


Tuesday, April 12, 2011

Gluten Free Lasagna!

Tinkyada makes a brown rice lasagna noodle that works just perfectly for homemade lasagna. We made it the other night and I literally could not taste the difference in the noodles at all. It turned out delicious. I also recently discovered the key to any lasagna recipe is mixing cottage cheese with the ricotta. It makes it easier to spread the layers, and it really adds a lot of moisture as well.

I made mine meatless, and made a meat-sauce on the side. Feel free to add ground beef to your sauce (to layer) if you prefer.

What You Need:

1 Box Tinkyada Lasagna Noodles
2 Jars Pasta Sauce (I used Classico Sweet Tomato Basil)
15 oz ricotta cheese
1 1/2 cups small curd cottage cheese (I used low-fat, worked fine)
2 cups mozzarella cheese
1 tsp basil
1 tsp oregano
1 tsp garlic powder
1 tsp onion powder

What You Do:


1. Cook noodles according to box instructions. Make sure not to over cook.
2. Drain and rinse noodles.
3. In a 9 x 13 pan, layer bottom of pan with a layer of tomato sauce.
4. In a medium bowl combine ricotta, cottage cheese, basil, oregano, onion powder, garlic powder, and 1/2 cup mozzarella.
5. Cover the layer of sauce at the bottom of the pan and make a layer of noodles across the pan.
6. Cover noodles with: cheese mixture, some mozzarella cheese, and then tomato sauce. Add more noodles to the top of the layer.
7. Continue layering in this pattern. For the top layer, simply top noodles with tomato sauce and remaining mozzarella cheese.
8. Cover with foil and bake at 350 for 35 minutes.
9. Remove foil and bake an additional 10-15 minutes or until cheese is melted on the top.

Enjoy! It's delicious! No one will know the difference in this pasta.