Friday, February 24, 2012

Chocolate Chip Cheesecake!

Last Valentine's Day, I cooked (Shrimp Scampi and Cheddar Bay Biscuits, gluten free!). This year we opted to go out - but I still wanted to do something special, so I made dessert! Gluten-Free Chocolate Chip Cheesecake, where obviously the challenge was making a gluten-free crust. 

What You Need:
  • 1 Box Betty Crocker (or other kind) Gluten Free Chocolate Chip Cookie Mix
  • Butter, vanilla, and egg as called for on box.
For the filling:
  • 3 packages (8 oz each) cream cheese, softened. I used 1/3 less fat. I don't think fat free would work.
  • 1 1/4 cups sugar
  • 2 teaspoons vanilla
  • 4 eggs
  • 1/2 cup miniature chocolate chips


I used Betty Crocker's Gluten Free Chocolate Chip Cookie mix (I am sure any GF cookie mix would work). I made it as directed and placed into a greased 10" pie pan, pressing it down firmly as you would a normal, homemade crust.
What You Do: 
1. Mix cookie dough according to box instructions and press firmly into a greased 10" pie pan. 
2. Preheat Oven to 325.
3. In a large bowl, mix together cream cheese (softened) and sugar until well blended. 
4. Beat in vanilla.
5. Beat in eggs, one at a time. 


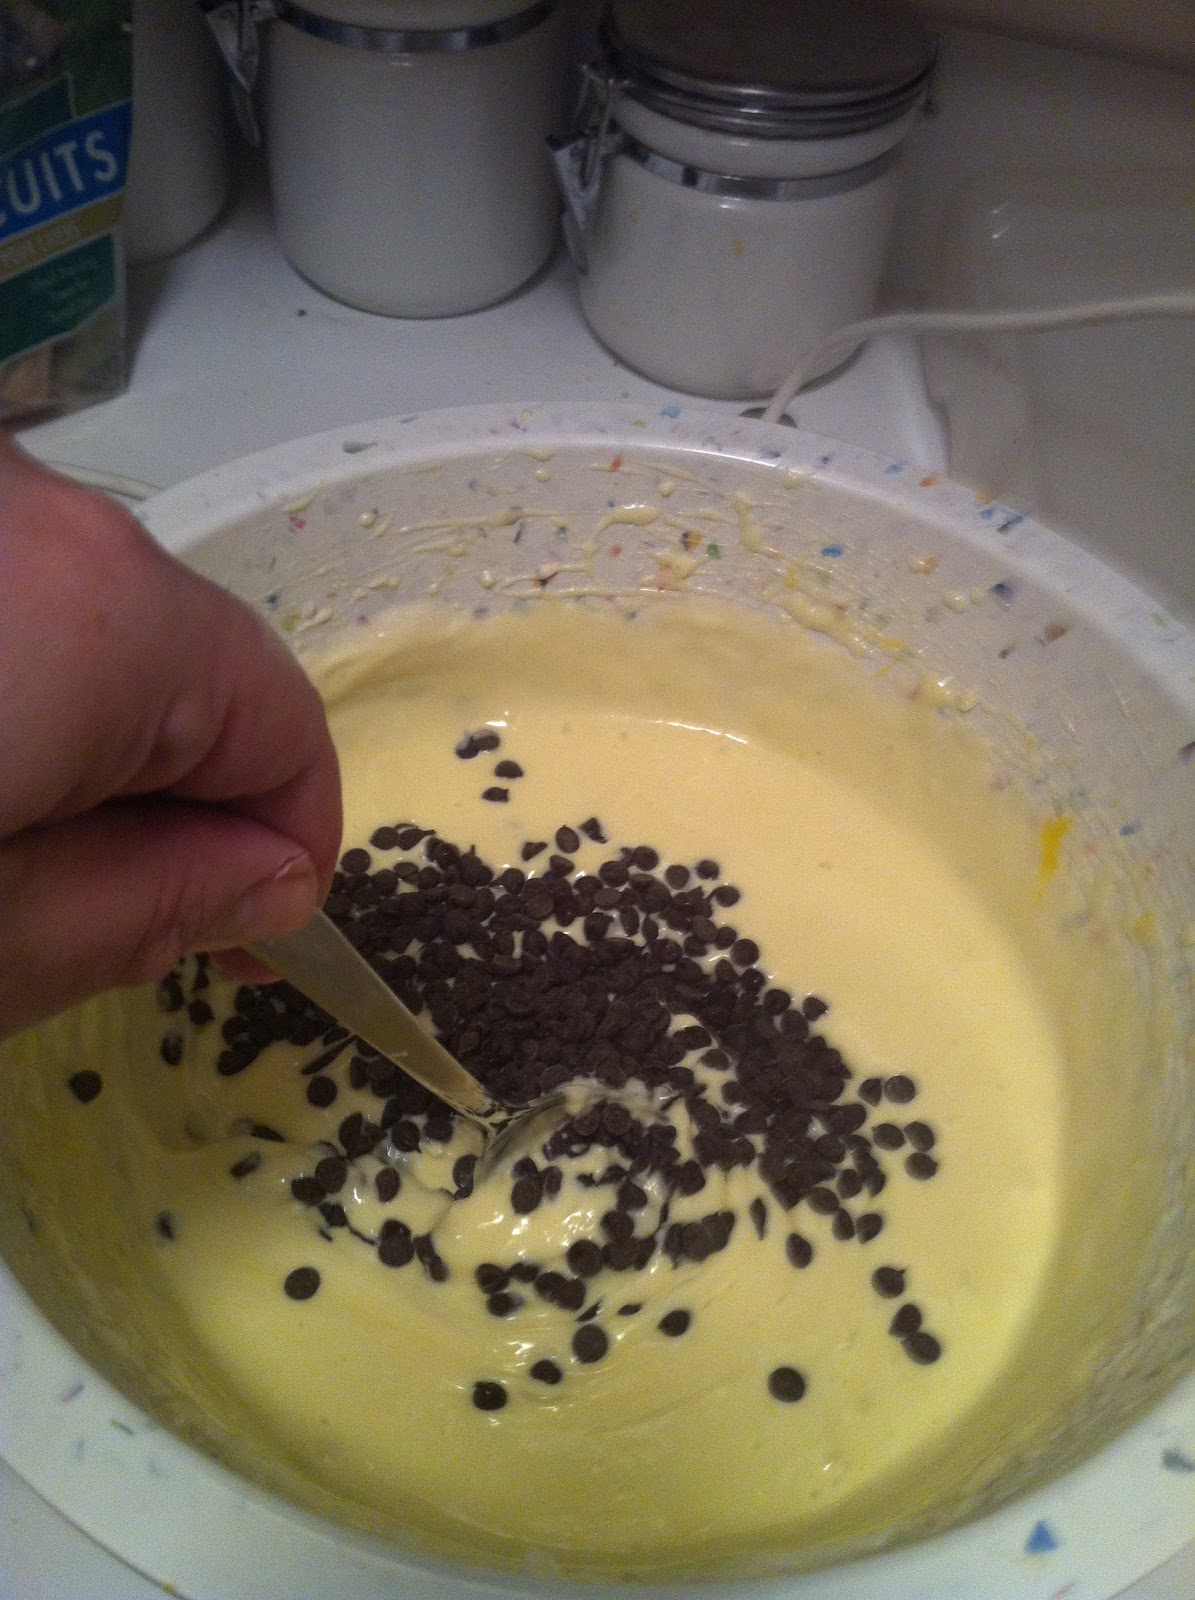
 6. After mixing in all four eggs, one at a time, stir in mini chocolate chips.


7. Pour  mixed filling into the crust. 
8. Bake 1 hour and 15 minutes or until crust edges are brown. Let cool completely before serving and place in the refrigerator if not serving immediately.


It was VERY good. I know this is not a healthy recipe by any means, but I was shocked how well it turned out to use cookie mix for the crust. We loved it - it was rich, but delicious. It was definitely way too much for two of us, but I know it would be a hit at a party... and I can almost guarantee you, people would have NO idea it was gluten free. :)

Tuesday, October 18, 2011

Gluten-Free Summer Pasta


Yummmmm. This is good stuff. It tastes so fresh. A friend of mine sent me a recipe from the New York Times called Summer Pasta. It is delicious. After making it a few times, using both regular pasta and gluten-free pasta, I have adapted my own version of it based on my personal taste and feedback from dinner guests.

Quick Disclaimer: For this particular time, I used regular pasta, but that is the only thing that is not gluten-free in the recipe so it can be easily substituted. That being said, I have made it using Trader Joe's Brown Rice Fusilli, and it was equally as delicious and fresh. You can use any type of gluten free farfalle, penne, or fusilli.

Another quick disclaimer: I really love garlic, so I don't mind it but some have told me the garlic taste is too strong in this recipe, since the garlic is added raw. If you aren't a huge fan of garlic, you may want to cook your garlic first over the stove in some olive oil. Personally, I like it the way it is.

The roasted tomatoes can be time consuming, but you can leave them for awhile without really paying attention to them. I think they are best slow roasted as the recipe states.... but there is an alternative. You can use grape tomatoes and get a similar taste in about a half hour. But, if you have the time, do it the 4 hour way. It's worth it.

SUMMER PASTA

What You Need:

For the roasted tomatoes:

Roasting grape tomatoes
2 1/2 pounds tomatoes (or as I mentioned, grape tomatoes if you don't have the time to slow roast, I used grape tomatoes this time, but I like it much better the other way)
2 tablespoons olive oil
1 1/2 teaspoons salt
2 teaspoons sugar

For the pasta:

Salt to taste, pepper optional
1 pound gluten-free pasta, like farfalle, penne, or fusilli
2 to 3 cloves garlic, finely minced and mashed

2 tablespoons melted butter
2 tablespoons extra virgin olive oil
2 ears corn, can be raw if very fresh, or lightly steamed if not
2 pints cherry or grape tomatoes (can be red, orange or yellow) halved or quartered
12 ounces fresh mozzarella
fresh mozzarella cut up
(some basil remained from cutting board)
1/4 cup grated parmesan cheese
1 cup mixed herbs, cut or torn into small pieces (mostly fresh basil, with some mint and parsley)

What You Do:

Roasting the Tomatoes:

1. Heat oven to 275 degrees. Line a large baking sheet with parchment paper. Slice tomatoes about 3/4 inch thick. Lay slices on baking sheet and drizzle with olive oil. Sprinkle with salt and sugar. Bake 15 minutes and reduce heat to 200 degrees. Continue baking, cooking halfway through until tomatoes shrink and are chewy but not crisp, approximately 4 to 6 hours. As I mentioned previously, if you don't have time to do this - an alternative is baking grape or cherry tomatoes (1 pint) after being halved, in the same mixture, olive oil, sugar, and salt at 350 for 30 minutes or so, turning halfway through. It will give a similar taste, but the best way is to do it the long way.

herbs, tomatoes, raw garlic
Chopped herbs
2. When tomatoes are roasted, bring a large pot of lightly salted water to a boil. Add pasta, cook until al dente. While pasta is cooking, chop roasted tomatoes very finely and place in a large serving bowl, along with the chopped garlic, butter and olive oil. Slice kernels from cobs of corn, and chop the other grape tomatoes, and herbs (finely) while pasta is cooking as well. Place tomatoes, corn, and herbs in a separate bowl. Slice fresh mozzarella into small pieces, and place in a separate bowl with the shredded parmesan.

3. When pasta is cooked, drain well. Add to the bowl with butter, garlic, and olive oil while still hot, and toss pasta.

4. Add the corn, cherry or grape tomato mixture and the cheese mixture. Toss well. Add herbs and toss well again. Add salt and pepper to taste while tossing.


Serve warm or at room temperature.

I didn't actually get to use the corn this particular time because unfortunately, it's October and sweet corn is out of season. However, it is SO good with the corn. This is the first time I have made it without and I definitely missed it. I thought it was strange at first to add the corn raw but it's actually delicious and very fresh. If you are able to get sweet corn, don't leave it out. It is delicious with these ingredients.

So good! You should definitely try this one.

Enjoy!

Monday, October 17, 2011

Chicken, Artichoke, and Wild Rice Casserole


This recipe was DELICIOUS, easy, and gluten-free. It could also be made ahead if necessary.

I used some ingredients I had around and modified a few recipes I had found online to make it gluten-free. We loved it. Very hearty and warm and delicious!

What you Need:
1 can Progresso Creamy Mushroom Soup (it's gluten-free!)
1 cup uncooked wild rice (I used Trader Joe's Basmati Rice Medley b/c it includes veggies. Any wild rice would do, or white or brown rice if you prefer those)
1 tbsp olive oil
1 lb cooked chicken breasts
1 bag frozen artichokes (I used Trader Joe's frozen artichokes, could also use a can of artichoke hearts or fresh artichokes)
1/4 cup low-fat mayo (could use regular if you'd like)
1/4 cup cheddar cheese (optional) for topping

What you Do:

1. If necessary, cook chicken breasts over stove. I used fresh chicken breast tenderloins and chopped them up first and seasoned them with salt and pepper. I cooked them with olive oil in a skillet for about 5-7 minutes or until browned.
2. Prepare 1 cup of wild rice (or white or brown rice) using 2 cups water and 1 tbsp olive oil. Prepare according to package directions.
3. In a large mixing bowl, combine creamy mushroom soup, artichokes (defrosted if frozen), mayo, cooked chicken, and cooked rice. Stir until mixed thoroughly.
4. Pour mixture into a 9 x 13 pan. Top with cheddar cheese (optional).
5. If making ahead, cover with foil and place in fridge. If ready to cook - preheat oven to 350 and cook for 30 minutes with foil covering the top.

Remove from oven and serve.

It was really good and really easy! Very hearty!

Enjoy!


Tuesday, April 12, 2011

Gluten Free Lasagna!

Tinkyada makes a brown rice lasagna noodle that works just perfectly for homemade lasagna. We made it the other night and I literally could not taste the difference in the noodles at all. It turned out delicious. I also recently discovered the key to any lasagna recipe is mixing cottage cheese with the ricotta. It makes it easier to spread the layers, and it really adds a lot of moisture as well.

I made mine meatless, and made a meat-sauce on the side. Feel free to add ground beef to your sauce (to layer) if you prefer.

What You Need:

1 Box Tinkyada Lasagna Noodles
2 Jars Pasta Sauce (I used Classico Sweet Tomato Basil)
15 oz ricotta cheese
1 1/2 cups small curd cottage cheese (I used low-fat, worked fine)
2 cups mozzarella cheese
1 tsp basil
1 tsp oregano
1 tsp garlic powder
1 tsp onion powder

What You Do:


1. Cook noodles according to box instructions. Make sure not to over cook.
2. Drain and rinse noodles.
3. In a 9 x 13 pan, layer bottom of pan with a layer of tomato sauce.
4. In a medium bowl combine ricotta, cottage cheese, basil, oregano, onion powder, garlic powder, and 1/2 cup mozzarella.
5. Cover the layer of sauce at the bottom of the pan and make a layer of noodles across the pan.
6. Cover noodles with: cheese mixture, some mozzarella cheese, and then tomato sauce. Add more noodles to the top of the layer.
7. Continue layering in this pattern. For the top layer, simply top noodles with tomato sauce and remaining mozzarella cheese.
8. Cover with foil and bake at 350 for 35 minutes.
9. Remove foil and bake an additional 10-15 minutes or until cheese is melted on the top.

Enjoy! It's delicious! No one will know the difference in this pasta.

Friday, April 1, 2011

Some Gluten Free Updates

I don't have any new fabulous recipes at the time, but I am making gluten-free lasagna tonight and will post the recipe when I'm finished! I did want to share a few exciting things though!

My favorite grocery store, Dominick's (Safeway store, all around the Chicago area) started to label their foods with tags that say "Gluten Free!" It is great because I get very tired of searching labels all the time. I really like it. They have a new program called "Simple Nutrition." Hopefully more stores follow the same trend soon.

Also, a great gluten free breakfast or snack, that may seem obvious but I seem to overlook a lot: Smoothies! It's the best way to make fruit and yogurt a little more fun, and healthy too. Today I just did it without a recipe: Mixed lowfat vanilla yogurt (2 containers) with frozen raspberries (about 3/4 cup or so), fresh strawberries (about 1/2 cup) and 1/4 cup milk. It was delicious, filling, and healthy. I really enjoyed it. I look forward to experimenting with more fruits (I think peaches, mangoes, blueberries, blackberries, etc). I personally don't care for bananas but I know they're a popular smoothie ingredient. Anyway, I just wanted to share that since I do forget about them a lot and I really really enjoyed my smoothie this morning! I think I will start to make them in a larger batch ahead and keep them in the fridge so I can always have them ready for the mornings. Yum.

Gluten free lasagna post to come!

Tuesday, March 8, 2011

Cheesy Broccoli Chicken Casserole

This was so easy and such a hit! I am going to add this to my "go to" recipes that are easy, few ingredients, and tasty! I modified a recipe that I found online... and this is what I came up with.

Cheesy Broccoli Chicken Casserole

What You Need:

2 1/2 cups chopped chicken breast meat (I used Tyson's Grilled Strips in the green bag, and chopped them up... they are delicious and gluten free)
1 can Progresso Creamy Mushroom Soup (it's gluten free)
1/2 cup Cheddar Cheese
16 ounces broccoli ( I used Green Giant's Steamers and cooked it beforehand to avoid extra water)
1 teaspoon ground black pepper
1 teaspoon garlic salt or garlic powder
Rice (optional)

What You Do:

1. Preheat oven to 350 degrees.
2. In a large bowl, combine chopped chicken, soup, cheese, broccoli (cooked), garlic and pepper, and rice if desired.
3. Mix well and spread into greased 9 x 13 pan. 
4. Cook for 50 minutes at 350 degrees, or until bubbly.


Tips:

I do have some tips with this dish, because next time I would do things a little differently...

1. I served the rice on the side, and put the casserole over the rice. Next time, I would add rice to the casserole. It comes out a little bit watery, and I think this would help, as well as add flavor to the rice. Either way, the flavor was delicious.

2. It is VERY important to cook the chicken and broccoli beforehand, so that the cooking process of those two items doesn't add any extra water to the food.

Overall... it was easy, and delicious! Enjoy!


Sunday, March 6, 2011

Fajita Night!

Fajita's are a great gluten-free option! They are easy to make and if you serve them with corn tortillas, they are 100% gluten free!

What You Need:
2 chicken breasts, cooked and cut into strips
1 red bell pepper
1 green pepper
1 medium sized onion
Fajita seasoning mix (Make sure to check the back for wheat ingredients)
1 tbsp olive oil
1/4 cup water
Corn Tortillas
Garnish: Cheese, Sour Cream, Guacamole

What You Do:
1. Slice the red pepper, green pepper, and the onion into lengthwise strips.
2. Heat up olive oil in medium skillet. Cook peppers and onions.
3. Add chicken to skillet.
4. Mix fajita seasoning with water and pour into skillet. Stir and simmer until liquid disappears.
5. Warm up corn tortillas in the microwave and serve.


So easy and so delicious! I like to make fajitas because guests can customize what they want inside their fajitas! Delicious!